WEB DESIGN . GRAPHIC DESIGN . PRINT . PROMOTIONAL

Apple Mail Tutorial
Note: As a courtesy to our customers, we provide online tutorials on how to configure various email software. Our staff, however, are not able to provide support on how to use Apple Mail or your Apple computer. For further assistance in using Apple Mail please visit Apple's Mail support pages.
Your email setting can be found by logging into your webmail here and then clicking on [Mail Client Configuration].
Setup email account using Apple Mail
- 1. Click Mail from the menu bar
- 2. Select Preferences
- 3. Click the Plus [+] icon located at the bottom left corner of the Accounts window
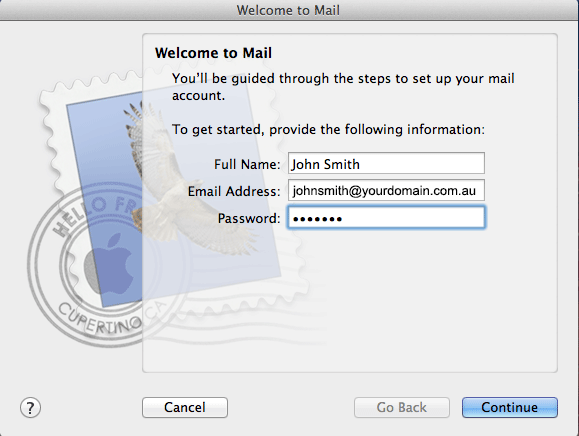
- 4. Complete the following information:
Full Name: The name displayed to the email recipient
Email Address: The email account you wish to connect to
Password: Email account password - 5. Click [Continue]
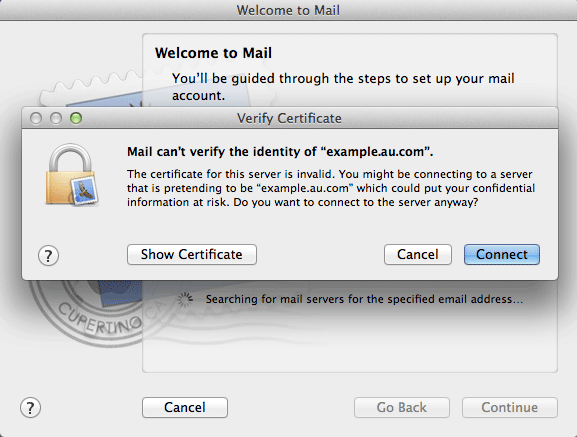
You might be greeted with a pop up stating that Apple Mail can't verify the identity of your domain. You can simply click [Connect] to continue.
Read through our SSL on shared email servers support page for more information about these warnings
- 6. You'll next be asked to enter your incoming mail server details
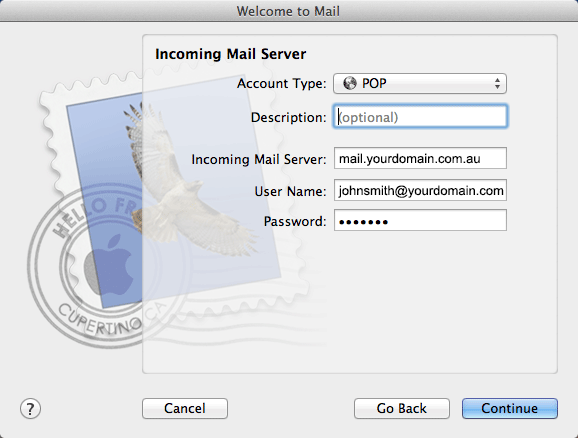
Complete the following information:
Account Type: Select POP or IMAP (for the purpose of this tutorial, we are using POP)
Description: May be any descriptive text (this is for your own use only and has no effect on your configuration)
Incoming mail server: mail.yourdomain.com.au where yourdomain.com.au is your domain name
User Name: The email address of the account you wish to connect to
Password: The password used for this email account
- 7. Click [Continue]
You may get another warning message about Apple Mail not being able to verify the identity of the server you are attempting to connect to. Simply click [Connect] to continue
- 8. Next you'll be asked to enter in your outgoing mail server details
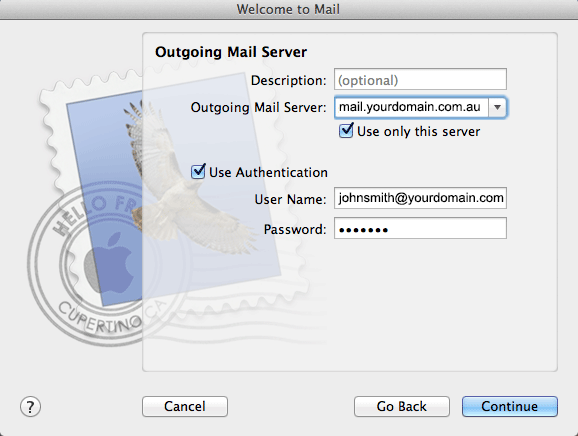
Complete the following information:
Description: This can be any descriptive text
Outgoing mail server: smtp.example.com
Use only this server: Tick this box if this is the primary email address you'll be using within Apple Mail
Use Authentication: Tick this box
User Name: The email address of the account you wish to connect to
Password: The password used for this email account
- 9. Click [Continue].
The next screen will display a summary of your settings
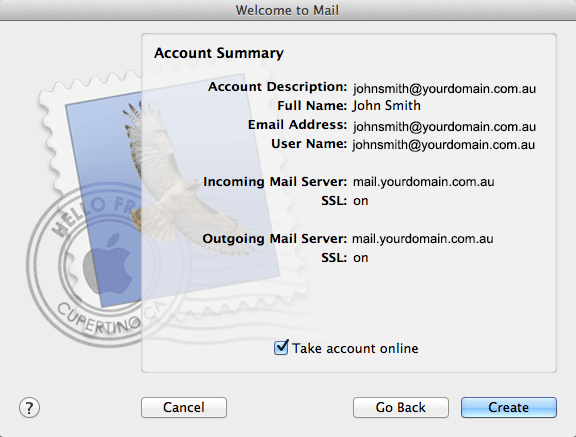
- 10. Review the settings you've selected and click [Create]
- 11. Your Apple Mail account should now be ready to use
Apple Mail Troubleshooting
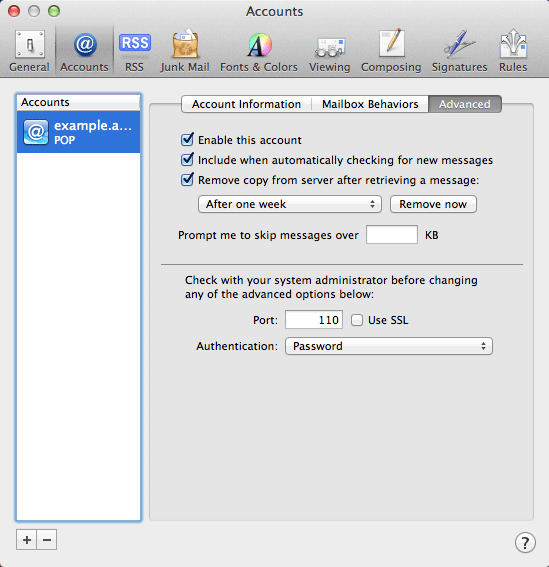
Common issues in Apple Mail are caused by the software auto-selecting users SSL and port number settings. If you are getting errors, double check that you are using the correct SSL and port number settings.- 1. To check and modify the SSL and port settings for incoming mail, select the account you want to make changes to from the left hand Accounts column, then click on the Advanced tab
- 2. From the Advanced tab, you'll be able to modify the port, SSL and Authentication settings. To determine which specific settings you should use, please see your email settings here by logging into your webmail and clicking [Configure Email Client].
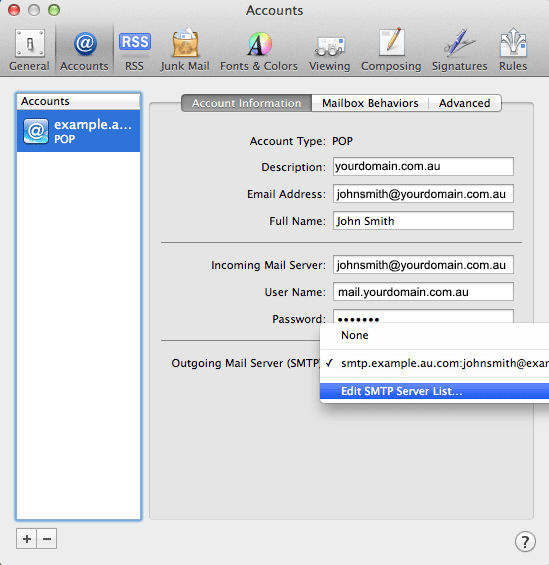
- 3. To modify the outgoing mail server settings, select the account you wish to make changes to from the left hand Accounts column
- 4. Next click on the Outgoing Mail Server currently being used
- 5. Select Edit SMTP Server List... from the drop down menu
- 6. Select the outgoing mail server you wish to modify from the list provided
- 7. Click the Advanced tab
- 8. From the Advanced tab, you'll be able to modify the port, SSL and Authentication settings. To determine which specific settings you should use, please see your email settings here by logging into your webmail and clicking [Configure Email Client].
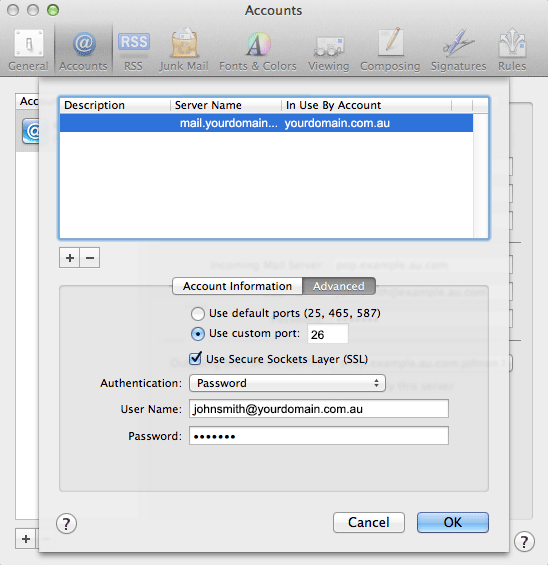
- 9. Once you have completed making changes, click [Ok]